


Laminate heating for wood and parquet
-
Vendor:Quality Heating
Vapor Barrier Film 12m2
Regular price £14.95 GBPRegular price
12m² per roll
Moisture protection
Easy installation
-
Vendor:Quality Heating
50cm - 80Watt per m² infrared underfloor heating without thermostat
Regular price From £59.00 GBPRegular price£0.00 GBPSale price From £59.00 GBP
Ideal under laminate and parquet
Ultra-thin: only 0.3mm
Easy DIY installation
-
Vendor:Quality Heating
Infrared Heating Film 50cm - 140 Watt/m²
Regular price £999.00 GBPRegular price£0.00 GBPSale price £999.00 GBP
Ideal under laminate and parquet
Ultra-thin: only 0.3mm
Easy DIY installation
-
Vendor:Quality Heating
50cm - 120 Watt/m² infrared underfloor heating without thermostat
Regular price £999.00 GBPRegular price£0.00 GBPSale price £999.00 GBP
Ideal under laminate and parquet
Ultra-thin: only 0.3mm
Easy DIY installation
-
Vendor:Quality Heating
50cm - 100 Watt/m² infrared underfloor heating without thermostat
Regular price £999.00 GBPRegular price£0.00 GBPSale price £999.00 GBP
Ideal under laminate and parquet
Ultra-thin: only 0.3mm
Easy DIY installation
-
Vendor:Quality Heating
Infrared Heating Film 100cm - 80 Watt/m²
Regular price From £29.00 GBPRegular price£0.00 GBPSale price From £29.00 GBP
Ideal under laminate and parquet
Ultra-thin: only 0.3mm
Easy DIY installation
-
Vendor:Quality Heating
100 cm - 140Watt/m² foil set without thermostat
Regular price £999.00 GBPRegular price£0.00 GBPSale price £999.00 GBP
Ideal under laminate and parquet
Ultra-thin: only 0.3mm
Easy DIY installation
-
Vendor:Quality Heating
100 cm - 120 Watt/m² foil set without thermostat
Regular price £999.00 GBPRegular price£0.00 GBPSale price £999.00 GBP
Ideal under laminate and parquet
Ultra-thin: only 0.3mm
Easy DIY installation
-
Vendor:Quality Heating
Infrared Heating Film 100cm - 100 Watt/m²
Regular price £999.00 GBPRegular price£0.00 GBPSale price £999.00 GBP
Ideal under laminate and parquet
Ultra-thin: only 0.3mm
Easy DIY installation
-
Vendor:Quality Heating
Automatic Wire Stripper with Cutting and Crimping Function
Regular price £9.95 GBPRegular priceAutomatic adjustment
3-in-1 function
Professional quality


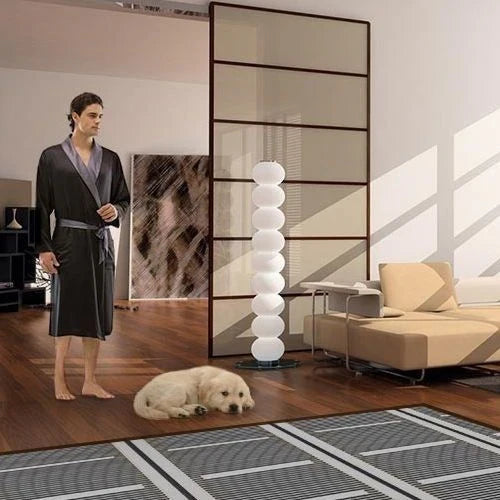

Infrared underfloor heating for wood, laminate and parquet
Nowadays, new homes more often have laminate, a wooden floor or parquet on the substrate. These types of floors are extremely popular because they are simple to install and easy to maintain. Residents often also desire infrared underfloor heating under such floors. However, there is often some doubt whether electric underfloor heating is possible with these types of floors. Quality Heating now offers infrared underfloor heating that is very suitable for under laminate, parquet or your wooden floor. Would you like more information or advice? Read on or contact our experienced heat advisers.
Infrared underfloor heating ultra-thin material
Quality Heating's infrared underfloor heating can be used as a main heating or as secondary heating for your home. The heating foil is wafer-thin and therefore very suitable to mount under your laminate, wooden floor or parquet. However, the small thickness of the foil does not detract from its energy capacity. With Quality Heating's infrared underfloor heating you can get the most out of your floor. The heat is distributed evenly over the floor and throughout the room, unlike heating from a single position such as radiators. Heating your floor using Quality Heating's underfloor heating foil is a very sustainable method and leads to a comfortable and healthy living climate.
Delivered fully ready-to-use as a complete set
- Infrared underfloor heating (width of 50 cm or width of 100 cm)
- Shrink connectors (connection clamps)
- Flexible supply wire 2.5mm
- Thermostat of your choice
- Flex pipe
- Floor sensor
- PP tape
Thermostat
The set is available with or without a thermostat, which allows you to heat the room(s) separately and according to your wishes. There are several options for a thermostat:
- Simple: The most basic thermostat, allowing you to switch the underfloor heating on/off and set the number of degrees.
- Programmable: With these thermostats you can set different programs so that the underfloor heating will turn on or off at the times you desire.
- WiFi: Via an app on your smartphone you can operate the underfloor heating remotely.
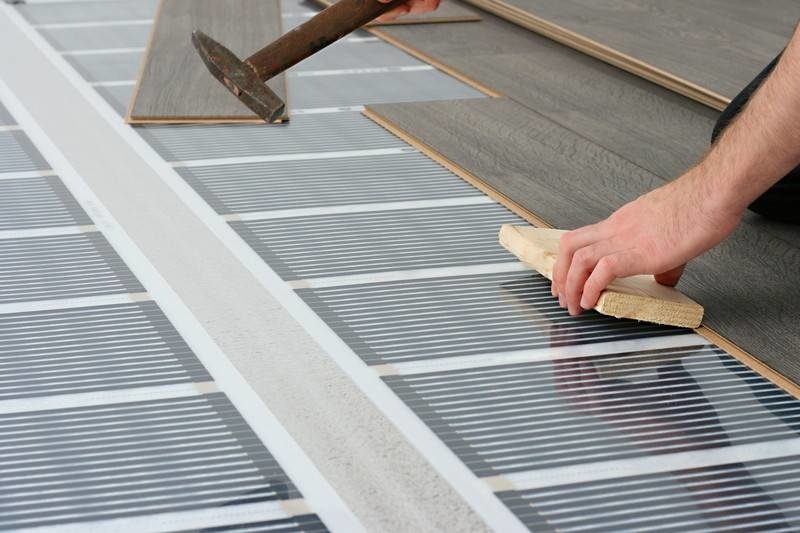
Assembly of your infrared underfloor heating
The assembly of the infrared underfloor heating is as follows: first ensure that the subfloor is clean and free of dust. Then you can place the insulation boards on the subfloor. Over those you can attach the foil set, on top of that comes the moisture-resistant foil. Once these steps are completed, you can place the final floor on top. Note, this build-up is suitable for wooden and parquet floors.

Installation in 4 steps
Step 1:

You choose yourself where to place the thermostat at approx. 1.50 meters height. From the thermostat two channels are made in the wall, in which you place the flex pipe. Through one channel the connection wires from the underfloor heating mat go and through the other channel you place the floor sensor. (you can place both the connection wires and the floor sensor in one flex pipe, but this will make replacing the floor sensor impossible)
Note: Make sure the floor sensor does not come into contact with the heating cable or a (hidden) radiator pipe.
Step 2:

You can lay the insulation boards on the floor. This insulation board has two sides, a blue side and a silver side. The blue side must always face the ceiling, the silver side must always face the subfloor. XPE-PRO reflective insulation with a high insulation value available in 7mm thickness developed for underfloor heating foil systems. The ISO-84 has a very high density and is built up of small closed cells that deliver excellent performance under underfloor heating foil. The structure of the ISO-84 ensures that no heat is conducted downwards, directing all heat towards the floor surface. Delivered per package of 7.2m2.
Step 3:
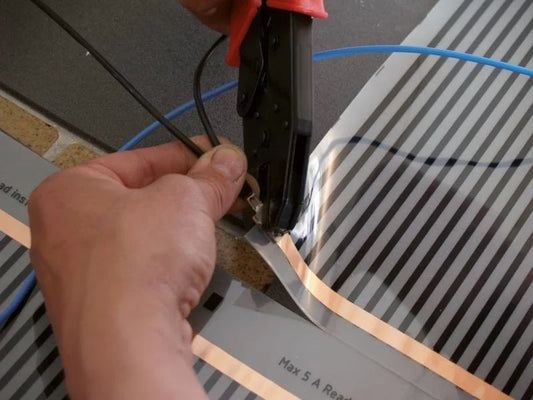
Roll out the underfloor heating foil, ensure that the foil lies completely flat and without corners or folds. Note, cut the foil only along the perforation! Cover the exposed copper ends, where no supply wire will be connected, with the supplied insulation tape. Roll the next underfloor heating foil parallel next to the first underfloor heating foil. The heating foil can be mounted to the floor with tape. Never place tape on the heated parts of the foil. Make sure that the widest surface of the copper strip is on the top. Once the complete floor surface is covered with the Quality Heating underfloor heating foil, the supply wires can be connected. Clamp the shrink connector using the pressure-distributing pliers/crimping pliers. Note: for a single supply wire (1st connection) always fold the core wire double! Always crimp both sides of the connector to the wiring. Then place the shrink connector over the copper conductor on the heating foil. Squeeze the pressure-distributing pliers tightly.
Step 4:
Cover the heating foil with moisture-resistant PE foil with a minimum thickness of 0.1mm. If necessary, you can use multiple layers to cover the total surface of the foil. Place the floor panels (parquet, wood or laminate) according to the manufacturer's instructions.
For the detailed steps you can consult the manual, which explains step by step how to lay the underfloor heating foil. If you cannot work it out, you can contact our customer service by phone and/or email.
